CONTENTS SUMMARY
학습 목표
- Redux와 React Router 라이브러리의 함수들 활용 실습을 한다.
- React를 통해 Card App을 만들어본다.
Card App 만들기 과정
Initial Installations
Redux
npm install react-redux
React Router
npm install react-router-dom
Styled Components
npm install styled-components
각 파일의 코드 및 기능 살펴보기
index.js
import { Provider } from 'react-redux'; //통합/관리
import { store } from './utilities/contents'; //상태 관리
const root = ReactDOM.createRoot(document.getElementById('root'));
root.render(
  <React.StrictMode>
    <Provider store={store}>
      <App />
    </Provider>
  </React.StrictMode>
);
utilties/contents.js
// reducer : 상태관리를 담당한 함수
export const store = createStore(reducer);
App.js
function App() {
  return (
      <BrowserRouter>
        <Menu>
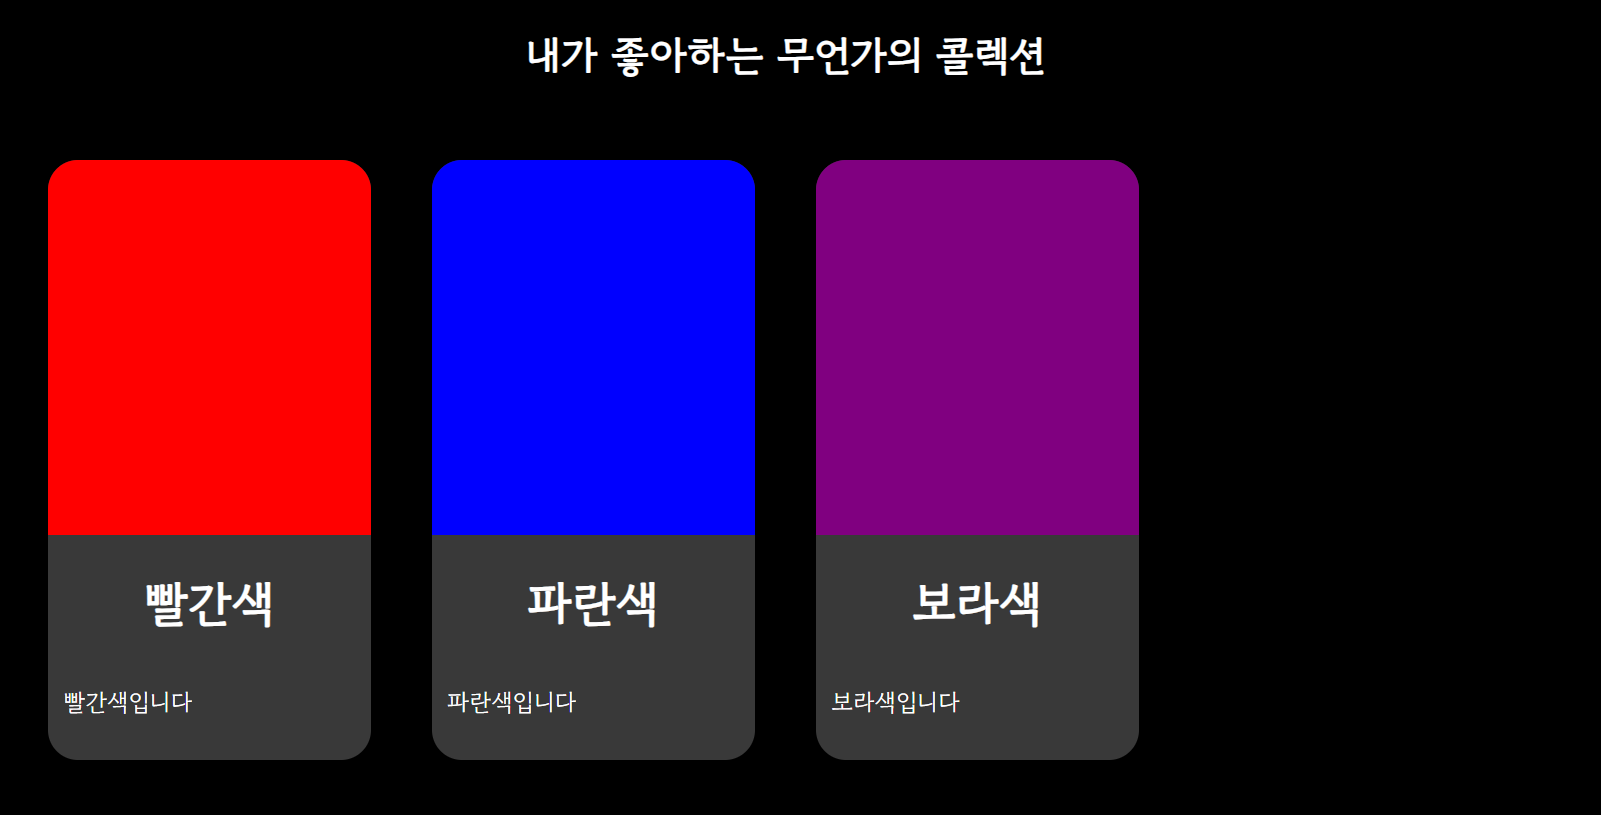
          <h2>내가 좋아하는 무언가의 콜렉션</h2>
        </Menu>
        <Routes>
          {useSelector((state) => state.contents).map((content, idx) => {
            return <Route path={content.path} key={idx} element={<Detail content={content.detail} />} />
          })}
          <Route path="/" element={<Cards />} />
        </Routes>
      </BrowserRouter>
  );
}
BrowserRouter : redux router
Routes : router routes
Detail.js
import { useNavigate } from 'react-router-dom'; // useNavigate: component 이동 기록 다루는 함수
Back button을 구현하기 위해 useNavigate를 사용했습니다.
contents.map (
//Insert card items here
	<Item></Item> //represents a card
)


contents.js
import { createStore } from 'redux';

// 카드 개별 항목에 대한 내용을 담은 배열
// detail : 상세 페이지에 담고 싶은 내용을 객체 literal로 표현한 키
const contents = [
  {
    path:"/red",
    imagePath: "red",
    title: "빨간색",
    character: "빨간색입니다",
    detail: {}
  },{
    path:"/blue",
    imagePath: "blue",
    title: "파란색",
    character: "파란색입니다",
    detail: {}
  },{
    path:"/purple",
    imagePath: "purple",
    title: "보라색",
    character: "보라색입니다",
    detail: {}
  },
]


// 이 앱에서는 상태에 대한 변경 진행하지 않음
function reducer(state, action) {
  return { contents } ;
}

// reducer : 상태관리를 담당한 함수
// reducer를 전달받아서 저장소를 생성하는 함수는 createStore
export const store = createStore(reducer);
index.css
@font-face {
  font-family: 'GowunDodum-Regular';
  src: url('https://cdn.jsdelivr.net/gh/projectnoonnu/noonfonts_2108@1.1/GowunDodum-Regular.woff') format('woff');
  font-weight: normal;
  font-style: normal;
}

*{
  font-family: 'GowunDodum-Regular';
}

body {
  background-color: black;
  margin: 0;
  font-family: -apple-system, BlinkMacSystemFont, 'Segoe UI', 'Roboto', 'Oxygen',
    'Ubuntu', 'Cantarell', 'Fira Sans', 'Droid Sans', 'Helvetica Neue',
    sans-serif;
  -webkit-font-smoothing: antialiased;
  -moz-osx-font-smoothing: grayscale;
}

code {
  font-family: source-code-pro, Menlo, Monaco, Consolas, 'Courier New',
    monospace;
}
App.js
import React from 'react'
import { BrowserRouter, Route, Routes } from 'react-router-dom'
import { Menu } from './styeldComp'
import Cards from './Cards'
import Detail from './Detail'
import { useSelector } from 'react-redux';

function App() {
  return (
      <BrowserRouter>
        <Menu>
          <h2>내가 좋아하는 무언가의 콜렉션</h2>
        </Menu>
        <Routes>
          {useSelector((state) => state.contents).map((content, idx) => {
            return <Route path={content.path} key={idx} element={<Detail content={content.detail} />} />
          })}
          <Route path="/" element={<Cards />} />
        </Routes>
      </BrowserRouter>
  );
}

export default App;
Detail.js
import React from 'react'
import { useNavigate } from 'react-router-dom'; // useNavigate: component 이동 기록 다루는 함수

const Detail = (props) =>{
  const navigate = useNavigate();
  return <div style={{paddingTop:20, textAlign:'center', color: 'white'}}>
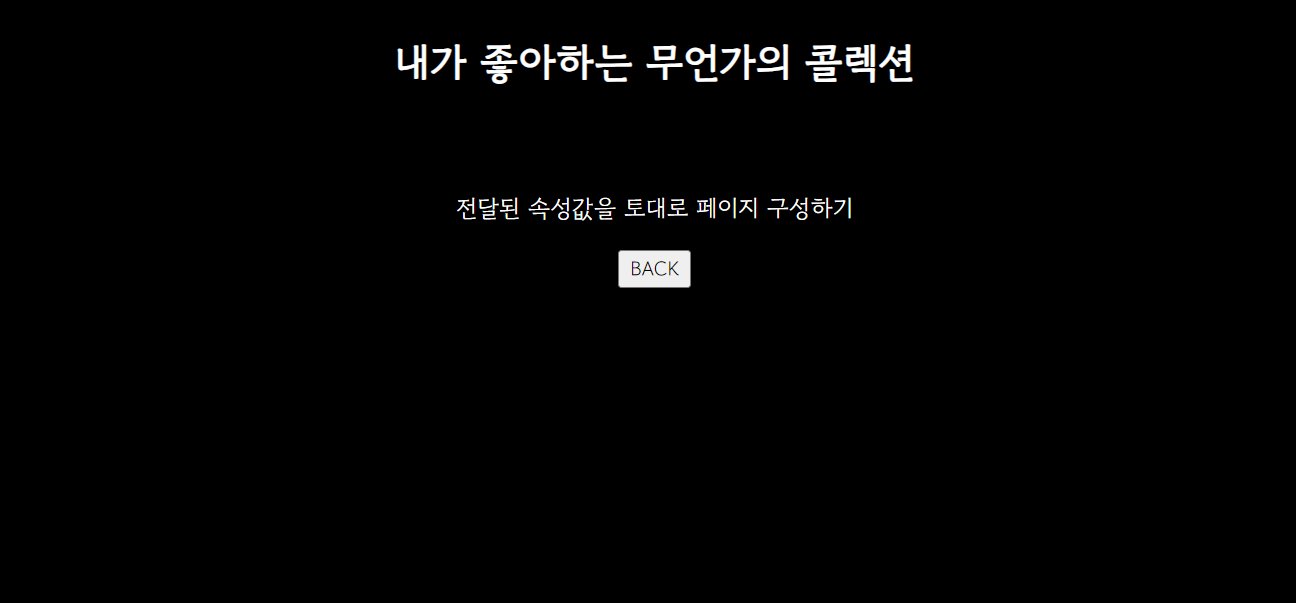
    <p>전달된 속성값을 토대로 페이지 구성하기</p>
    <button onClick={() => navigate(-1)}>BACK</button>
  </div>
}

export default Detail
styledComp.js
import styled from 'styled-components'

export const Menu = styled.div`
  position: sticky; top: 0;
  width: 100%; height: 100px;
  font-size: 18px;
  color: #FFFFFF;
  display: flex;
  justify-content: center;
  align-items: center;
`

export const Items = styled.div`
  display: flex;
  flex-wrap: wrap;
  width: 60%; margin: 0 auto;

  @media all and (max-width: 1500px){
    width: 80%;
  }
  @media all and (max-width: 1000px){
    width: 100%;
  }
`

export const Item = styled.div`
  cursor: pointer;
  width: 21%; height: 400px;
  margin: 2%;
  border-radius: 20px;
  color: #FFFFFF;
  background-color: #393939;
  overflow: hidden;
  &:hover{
    transform: translate(0, -20px);
  }
  @media all and (max-width: 800px){
    width: 46%;
  }
  @media all and (max-width: 500px){
    width: 98%;
  }
`
export const Image = styled.div`
  height: 250px;
  background-image: url(${props => props.imagePath});
  background-repeat: no-repeat;
  @media all and (max-width: 500px){
    background-size: 100% 100%;
  }
`
export const ColorBox = styled.div`
  height: 250px;
  background-color: ${props => props.color};
  background-repeat: no-repeat;
  background-size: cover;
  @media all and (max-width: 500px){
    background-size: 100% 100%;
  }
`
sticky: 상단에 고정
상단에 표시되는 Menu
export const Menu = styled.div`
  position: sticky; top: 0;
  width: 100%; height: 100px;
  font-size: 18px;
  color: #FFFFFF;
  display: flex;
  justify-content: center;
  align-items: center;
`
Media queries within styled components
카드가 여러 개인 경우, flex-wrap을 통해 여러줄로 표시해봤습니다.
그리고, 화면의 크기에 따라 카드의 크기를 조절하기 위해 styled component 안에서 media query를 정의했습니다.
- 1500px보다 작을 때 80% 너비를 차지한다.
- 1000px보다 작을 때 100% 너비를 차지한다.
export const Items = styled.div`
  display: flex;
  flex-wrap: wrap;
  width: 60%; margin: 0 auto;

  @media all and (max-width: 1500px){
    width: 80%;
  }
  @media all and (max-width: 1000px){
    width: 100%;
  }
`
Cards.js
import React from 'react'
import { NavLink } from 'react-router-dom'
import { Items, Item, Image, ColorBox } from './styledComp'
import { useSelector } from 'react-redux';

const Cards = () => {
  const contents = useSelector((state) => state.contents)
  return (
  <Items>
    {contents.map((content, idx) => {
      return <Item key={idx}>
      <NavLink to={content.path}>
        <ColorBox color={content.imagePath}></ColorBox>
      </NavLink>
      <h1 style={{textAlign:'center'}}>{content.title}</h1>
      <p style={{padding: 10}}>{content.character}</p>
    </Item>
    })}
  </Items>
  )
}

export default Cards;
Card App 커스터마이징
수정할 코드는 다음과 같습니다.
- utilities/contents.js - contents 배열의 내용을 자신의 주제에 맞게 수정하기
- index.css, styledComp.js - 구현된 스타일을 자신의 컨에 맞게 수정하기
- Detail.js를 contents의 내용에 맞게 직접 디자인하고 구현해보기
Modify Cards.js <NavLink>
<NavLink to={content.path} state={content.detail}>
Modify Detail.js
import { useNavigate, useLocation } from 'react-router-dom';
Add description when clicking on item
const Detail = (props) =>{
  const navigate = useNavigate();
  const location = useLocation();
  const description = location.state.description || ''; //Access the description vis useLocation()

  return (
    <div style={{paddingTop:20, textAlign:'center', color: 'white'}}>
      <p style={{padding: 10}}>{description}</p>
      <button onClick={() => navigate(-1)}>BACK</button>
    </div>
  );
}
Image, Video Rendering
원래는 HTML 웹페이지에 이미지 또는 영상을 넣으려면 소스 또는 원래 파일을 가지고 있어야 합니다. 하지만 React를 통해 resource 사용을 줄이도록 <iframe> 요소를 활용할 수 있습니다. <iframe>을 통해 외부의 링크만 받고 영상 또는 이미지를 가져올 수 있습니다.
이번 실습에서 <iframe>을 통해 유튜브 영상을 한번 embedding해 보겠습니다.
Embed videos from YouTube
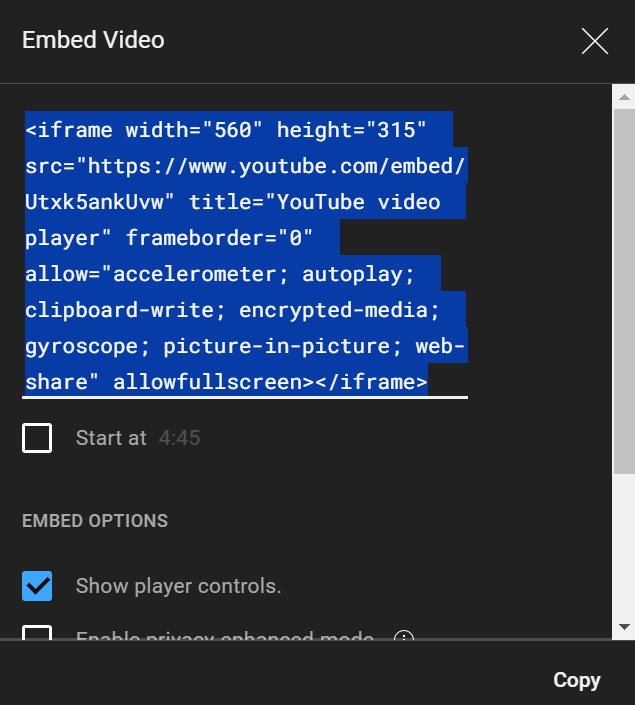
웹 페이지에다 유튜브 영상을 임베딩하려면 원하는 영상을 유튜브에서 열어본 후 ‘공유’(Share) 버튼을 누른 다음에 ‘Embed’ 옵션을 선택합니다. ‘Embed’ 옵션을 선택한 후 아래 창이 나타나 유튜브 플레이어를 호출하여 영상을 플레이해주는 iframe 코드가 생성됩니다. 이를 복사하고 리액트 앱의 코드에서 붙이면 웹 페이지에서 해당 영상을 볼 수 있게 됩니다.

detail: {
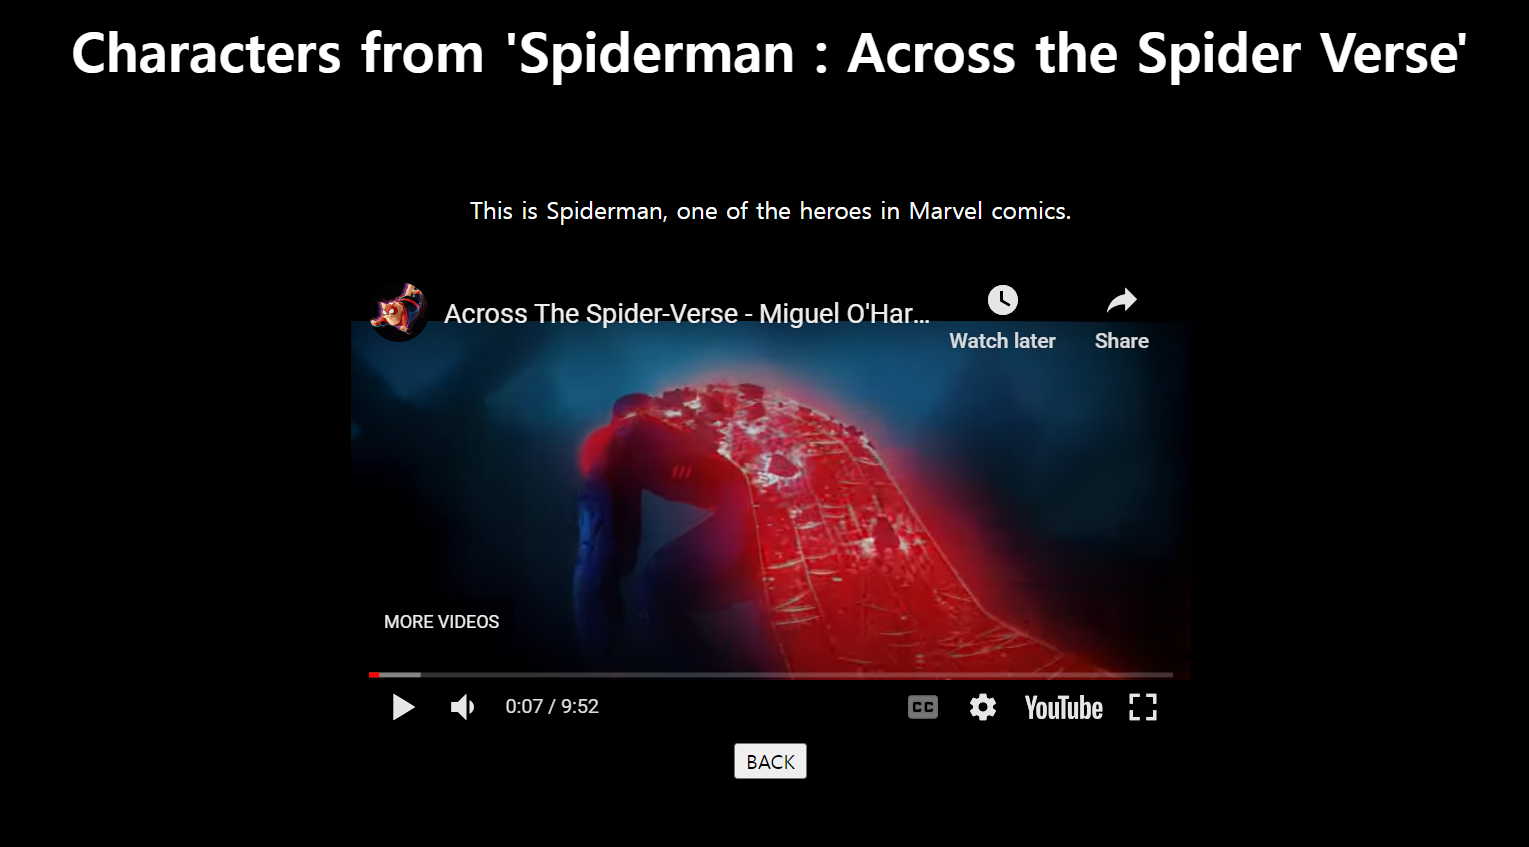
  description: "This is Spiderman, one of the heroes in Marvel comics.",
  detailImage: "spiderman.png",
  videoSrc: `<iframe width="560" height="315" src="https://www.youtube.com/embed/Utxk5ankUvw" title="YouTube video player" frameborder="0" allow="accelerometer; autoplay; clipboard-write; encrypted-media; gyroscope; picture-in-picture; web-share" allowfullscreen></iframe>`
}
dangerouslySetInnerHTML attribute
문자열 형태로 표현된 markup을 react component 내에서 실제 markup을 변환하는 데 dangerouslySetInnerHTML 속성을 활용했습니다.
const Detail = (props) =>{
  const navigate = useNavigate();
  const location = useLocation();
  const description = location.state.description || ''; //Access the description vis useLocation()
  const video = location.state.videoSrc || '';

  function createMarkup() {
    return { __html: video };
  }

  return (
    <div style={{paddingTop:20, textAlign:'center', color: 'white'}}>
      <p style={{padding: 10}}>{description}</p>
      <div dangerouslySetInnerHTML={createMarkup()}></div>
      <button onClick={() => navigate(-1)}>BACK</button>
    </div>
  );
}
In content.js
{
    path:"/miguel_ohara",
    imagePath: "miguel_ohara.png",
    title: "Miguel O'Hara",
    character: "I'm Miguel O'Hara",
    detail: {
      description: "This is Spiderman, one of the heroes in Marvel comics.",
      detailImage: "spiderman.png",
      videoSrc: `<iframe width="560" height="315" src="https://www.youtube.com/embed/Utxk5ankUvw" title="YouTube video player" frameborder="0" allow="accelerometer; autoplay; clipboard-write; encrypted-media; gyroscope; picture-in-picture; web-share" allowfullscreen></iframe>`
    }
  }

useLocation()을 사용하지 않은 코드
위 코드에서 useLocation을 사용했지만, 이 함수를 사용하지 않아도 Detail에 주어지는 인자인 props안에서 content 안에 있는 내용을 접근할 수 있는 방법을 늦게 알게 되었습니다… 이 방법은 다음 코드에서 볼 수 있습니다.
const Detail = (props) =>{
  const navigate = useNavigate();
  return (
    <div style={{paddingTop:20, textAlign:'center', color: 'white'}}>
      <p style={{padding: 10}}>{props.content.description}</p>
      <div dangerouslySetInnerHTML={{__html: props.content.videoSrc}}></div>
      <button style={{margin: 50, padding: 10, paddingLeft: 20, paddingRight: 20}} onClick={() => navigate(-1)}>BACK</button>
    </div>
  );
}
Add Images instead of color (Replace <ColorBox> with <Image>)
각 카드의 커버로 색깔 대신에 이미지를 나타낼 수 있도록 <ColorBox> 컴포넌트 대신에 <Image> 컴포넌트를 사용했습니다.
<Image imagePath={content.imagePath}></Image>
Playing YouTube video on background
Set width, height
set iframe in contents.js : width=100%, height=100% div style in Detail.js : width: 100%, height:100%,
Set to background
position: absolute, top:0, left:0, z-index: -1
Disable other functions
Disable hover YT player effects, disable user select
userSelect: ’none’, pointerEvents: ’none’
Youtube Player Parameters
controls=0 : disable youtube play, pause, etc. UI controls autoplay=1 : play video automatically loop=1 : loop video playlist={VIDEO_ID} : creates playlist with one specific video for looping disablekb=1 : disable youtube player keyboard commands/shortcuts mute=1 : mute video modestbranding=1 : hide details and branding (deprecated…)
Edit index.css
body {
  ...
  overflow: hidden;
}

iframe{
  position:absolute;
  top:50%;
  transform:translateY(-60%);
  left:0;
  pointer-events:none;
  width:100vw;
  height:56.25vw;
}

.wrapper {
  width: 100vw;
  height: 100vh;
  position: relative;
  overflow: hidden;
}
Code added to tweak position of video player and hide some branding, etc.
Hide scrollbars with overflow:hidden in body tag
NOTE. Only
Edit <Image> styled component
export const Image = styled.div`
  height: 250px;
  background-image: url(${props => props.imagePath});
  background-size: cover;
  background-position: center;
  background-repeat: no-repeat;
  @media all and (max-width: 500px){
    background-size: 100% 100%;
  }
`
Added background-position: center to center character images
Edit <Items> styled component
export const Items = styled.div`
  display: flex;
  flex-wrap: wrap;
  width: 60%;
  margin: 0 auto;

  @media all and (max-width: 1600px){
    width: 80%;
  }
  @media all and (max-width: 1000px){
    width: 100%;
  }
  /*Center four cards at once*/
  * {
    flex: 0 0 calc(25% - 23px);
    margin-bottom: 20px;
  }
`
Added flexbox code to center four cards per line.
OUTPUT
Output Video
Netlify 링크
https://nipa-frontend-card-app-4-eunice.netlify.app/
SOURCE
https://github.com/ganyunhee/react_cardapp_custom
TO IMPROVE
- 텍스트와 레이아웃을 예쁘게 꾸미고 정리할 것
- 각 카드의 상세 페이지 내용: 캐릭터 이름을 큰 타이틀로 설정, 그 다음 캐릭터 설명을 추가할 것
- 상세 페이지에 들어갈 때 각 캐릭터의 theme 음악을 재생할 것
- e.g. Miguel : Miguel Theme, Miles : Sunflower, Gwen : Drum Solo (Across the Spiderverse Intro), Peter : My Name.. is Peter B. Parker
- Sound ON/OFF 기능 버튼 넣을 것
REFERENCES
- DOM Elements -
dangerouslySetInnerHTMLattribute https://legacy.reactjs.org/docs/dom-elements.html - YouTube Embedded Players and Player Parameters. https://developers.google.com/youtube/player_parameters
- How to embed a video background on a website (fast, loop, autoplay). https://stackoverflow.com/questions/73679219/how-to-embed-a-video-background-on-a-website-fast-loop-autoplay
- HTML YouTube Videos. https://www.w3schools.com/html/html_youtube.asp
- Across The Spiderverse - Official Gallery by SONY https://www.acrossthespiderverse.movie/gallery/
——————————————————————————
본 후기는 정보통신산업진흥원(NIPA)에서 주관하는 <AI 서비스 완성! AI+웹개발 취업캠프 - 프론트엔드&백엔드> 과정 학습/프로젝트/과제 기록으로 작성 되었습니다. #정보통신산업진흥원 #NIPA #AI교육 #프로젝트 #유데미 #IT개발캠프 #개발자부트캠프 #프론트엔드 #백엔드 #AI웹개발취업캠프 #취업캠프 #개발취업캠프