CONTENTS SUMMARY
학습 목표
- NodeJS와 JavaScript 코딩 마무리한다.
- React Application을 만드는 과정을 배운다.
- JavaScript에서 만들었던 코드를 React와 JSX로 만드는 실습을 한다.
Week 4: 1회차 CONTINUATION
저번에는 addMorgan.js와 Node JS module에 대해서 배웠습니다.
이번에는 addURL.js를 통해 url을 연결시키는 방법을 배웠습니다.
RECALL 노드 기반의 JS Project
- 서버 만들기 – 데이터를 제공하는 컴퓨터 또는 프로그램 서버를 통해 문서를 제공할 때 주의할 점 – 서버가 문서들을 읽어서 적용
const url = require('url');
서버는 문서의 주소를 해석해서 문서를 제공합니다. 문서의 주소는 url로 나타냅니다.
var morgan = require('morgan')
var logger = morgan('tiny')
const server = http.createServer(function (req, res) {

  const pageURL = req.url;
  const pathname = url.parse(pageURL, true).pathname;
  ...
}
req.url : 요청 주소를 읽고
parse : url을 해석 – 거기 붙어 있는 경로(path)
node addUrl.js
HTML 요소를 선책하는 방법
getElementById(id)
querySelector(css_selector)
addUrl.js 파악해보기
res.end(data);

//vs.

res.write(data);
res.end()
end와 write의 차이
end– 데이터를 전달하고 종료한다write– 데이터 전송만 한다
Week 4: 2회차 START
2회차부터 React 학습을 시작했습니다. React를 통해 애플리케이션을 만드는 방법은 다음과 같습니다.
React의 기본형 프로젝트 만들기
React 프로젝트의 템플릿 또는 기본형태를 만들어주는 명령어는 npx create-react-app입니다.
개발을 바로 시작할 수 있게끔 어떤 형태를 잡아주는 도구들을 갖다가 일반적으로 boiler plate(데워진 접)라고 부릅니다.
아래 명령어와 같이 my-app이라는 React 애플리케이션을 만들겠습니다.
npx create-react-app my-app
위 명령어를 실행한 후 콘솔에서 아래 나용처럼 텍스트가 나타납니다.
C:\Users\Eunice\OneDrive - Sogang\바탕 화면\git\ai_webdev\react\0808>npx create-react-app my-app
Need to install the following packages:
  create-react-app@5.0.1
Ok to proceed? (y) y
npm WARN deprecated tar@2.2.2: This version of tar is no longer supported, and will not receive security updates. Please upgrade asap.

Creating a new React app in C:\Users\Eunice\OneDrive - Sogang\바탕 화면\git\ai_webdev\react\0808\my-app.

Installing packages. This might take a couple of minutes.
Installing react, react-dom, and react-scripts with cra-template...


added 1426 packages in 1m

231 packages are looking for funding
  run `npm fund` for details

Installing template dependencies using npm...

added 74 packages, and changed 1 package in 7s

240 packages are looking for funding
  run `npm fund` for details
Removing template package using npm...


removed 1 package, and audited 1500 packages in 2s

240 packages are looking for funding
  run `npm fund` for details

6 high severity vulnerabilities

To address all issues (including breaking changes), run:
  npm audit fix --force

Run `npm audit` for details.

Success! Created my-app at C:\Users\Eunice\OneDrive - Sogang\바탕 화면\git\ai_webdev\react\0808\my-app
Inside that directory, you can run several commands:

  npm start
    Starts the development server.

  npm run build
    Bundles the app into static files for production.

  npm test
    Starts the test runner.

  npm run eject
    Removes this tool and copies build dependencies, configuration files
    and scripts into the app directory. If you do this, you can’t go back!

We suggest that you begin by typing:

  cd my-app
  npm start

Happy hacking!
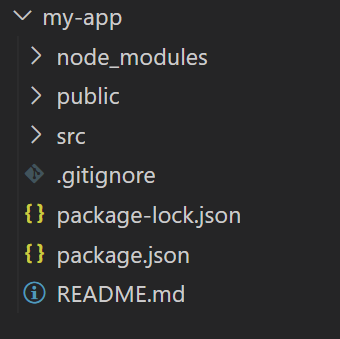
Happy Hacking!이라는 문장이 나타나고 my-app 폴더가 생성되면 가본형 React 애플리케이션이 이제 만들어진 상태입니다.
VS Code에서 폴더는 다음 사진처럼 나타납니다.
RECALL. package.json – Node JS의 관리 파일
src 폴더 안에서 작업
react 에플리케이션 폴더 안에서 들어가기
cd my-app
package.json 관리 파일의 내용을 보면 start, build 등 기본 명령어가 설정되어 있는 것을 확인할 수 있습니다.
  "scripts": {
    "start": "react-scripts start",
    "build": "react-scripts build",
    "test": "react-scripts test",
    "eject": "react-scripts eject"
  },
start 명령어를 통해 어플리케이션을 시작합니다.
react 애플리케이션 실행 명령어 npm start
JSON 파일에 있는 script들은 npm 기반으로 돌아가게 되니 다음 명령얼어를 실행하여 react app을 시작합니다.
npm-start

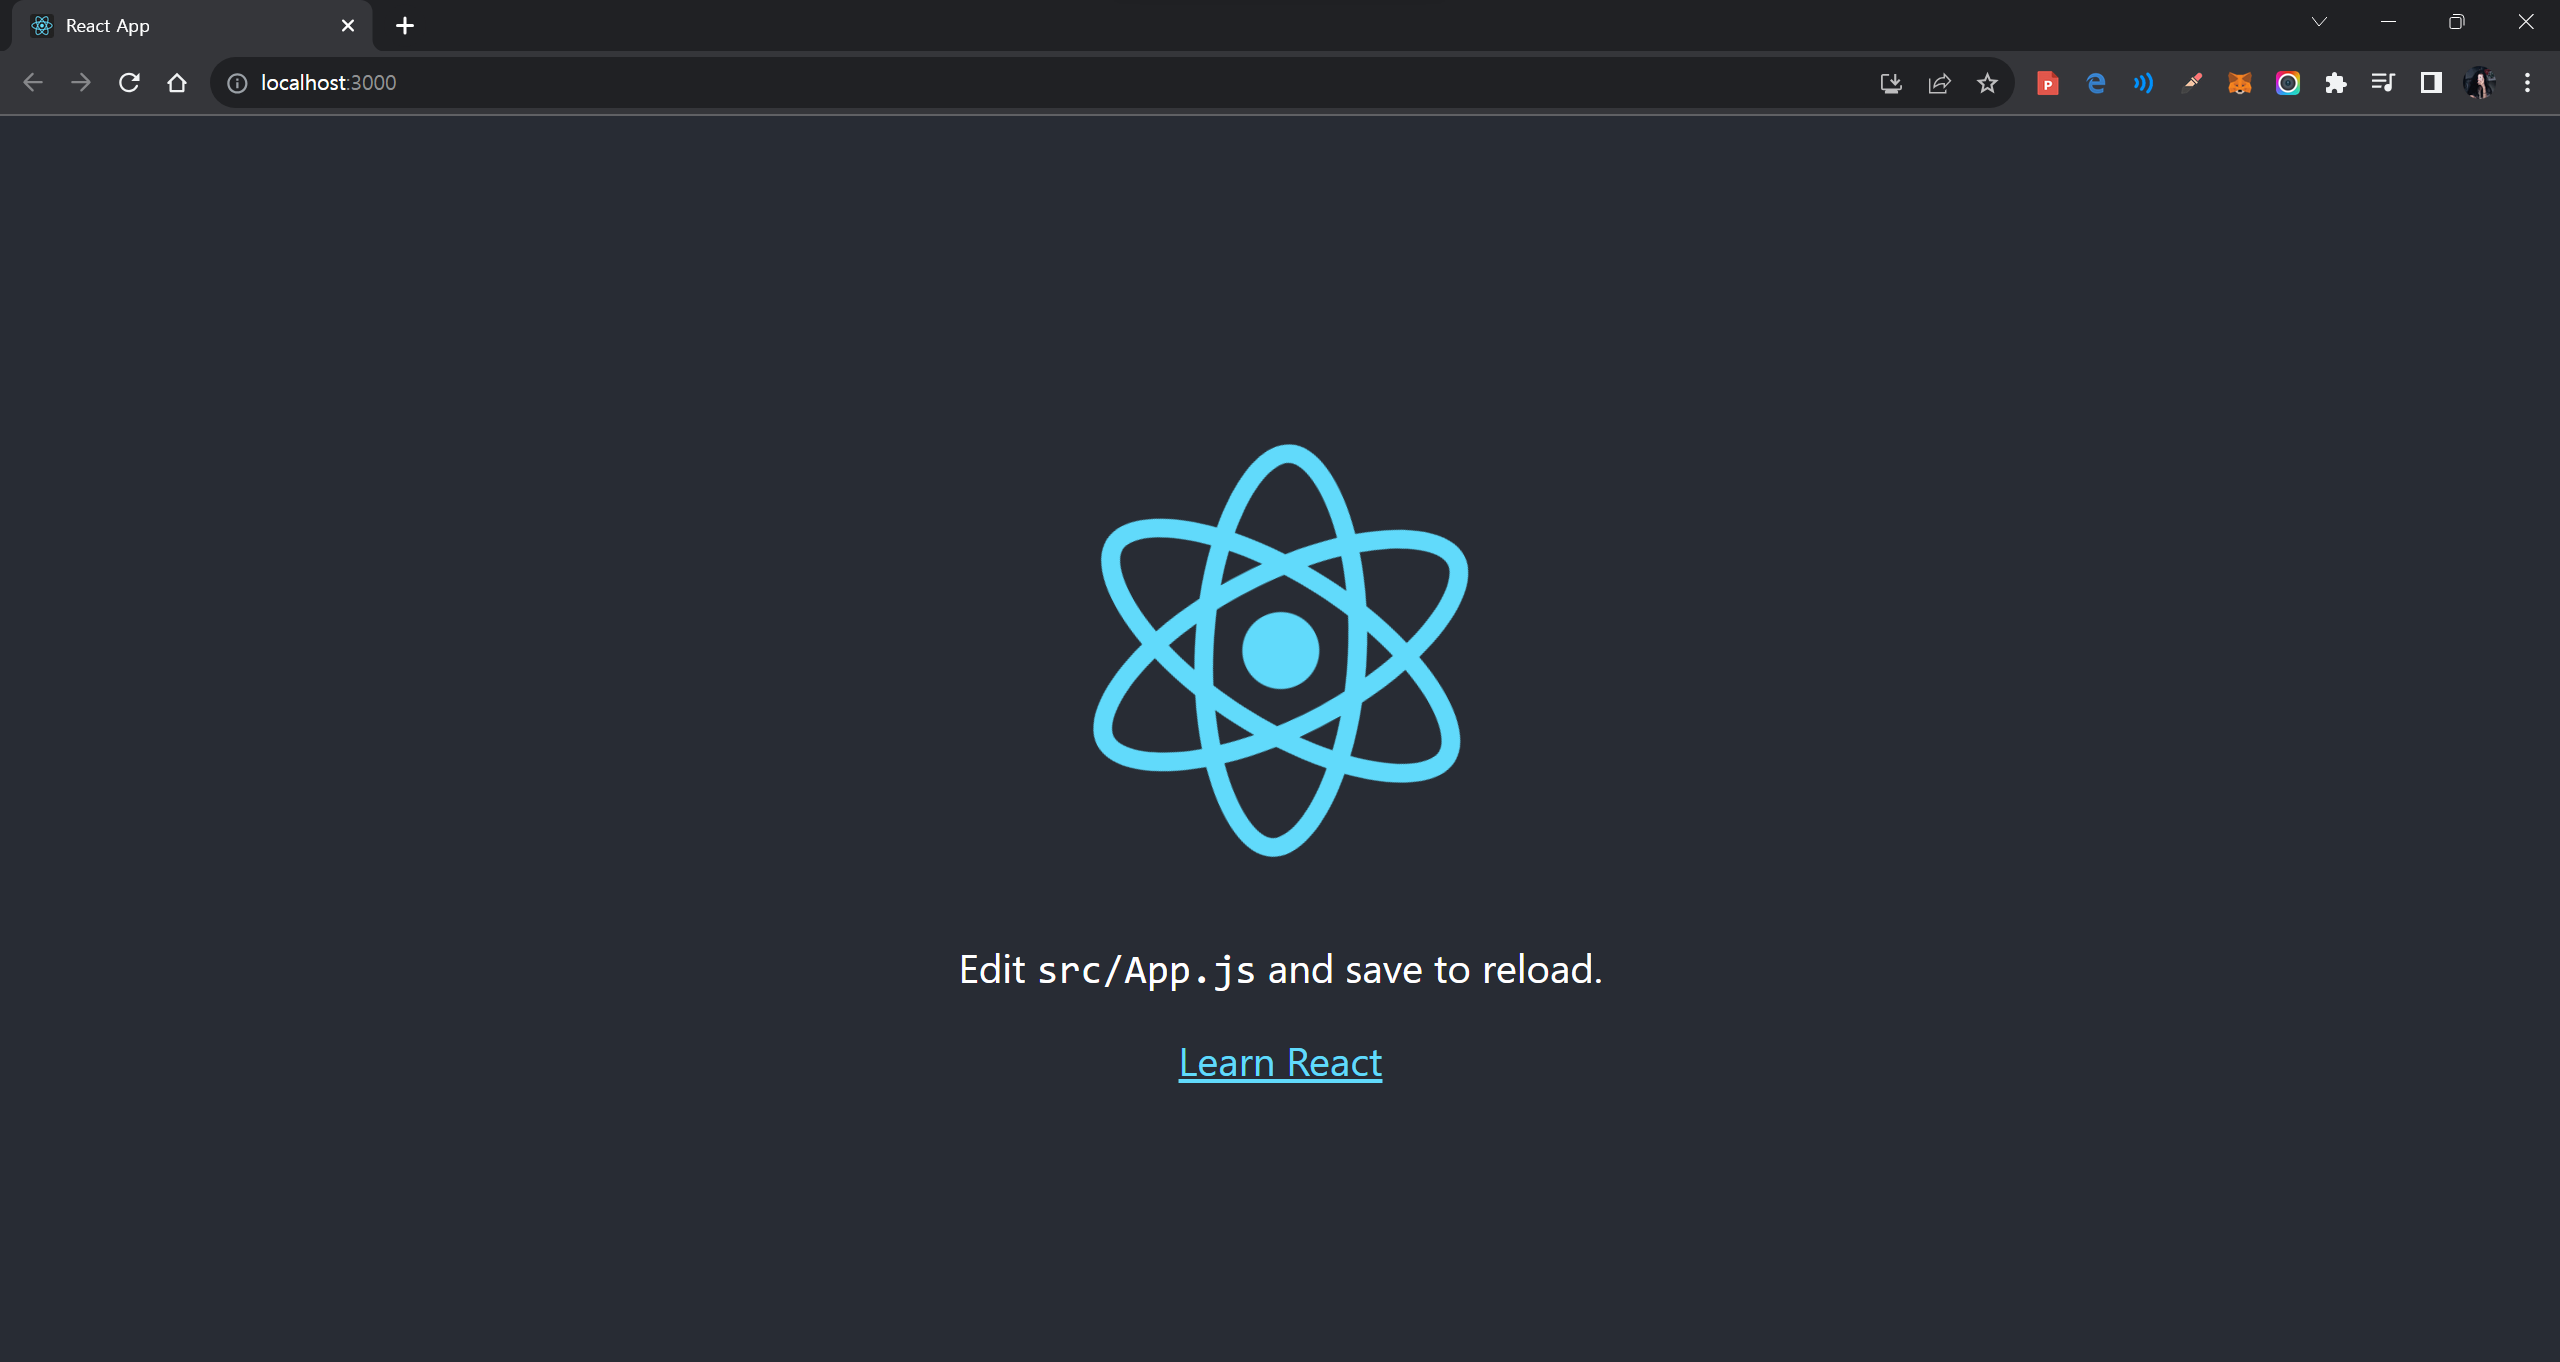
자동으로 React 애플리케이션이 열렸습니다.
웹사이트에 구현이 된 상태로 react app이 만들어졌습니다.
src 폴더 안에 있는 index.js 파일은 리액트 애플리케이션이 실행될 때 가장 먼저 실행되는 진입점(entry point) 역할을 수행한다.
const root = ReactDOM.createRoot(document.getElementById('root'));
root.render(
  <React.StrictMode>
    <App />
  </React.StrictMode>
);
<App /> 태그는 App의 UI 전체를 포함하는 태그입니다.
이 태그를 지우면 index.js를 실행해도 웹 브라우저 화면에 아무것도 나타나지 않습니다.
React의 loading screen은 <App /> 태그 또는 컴포넌트 안에 구현되어 있습니다.
App06.js 실습
- 상태 관리 component 만들기
- JS 파일과 stylesheet(.css) 파일 만들기
index.js에서 import하는 App 이름 변경
import { useState } from 'react'

function App() {

    const [ lottoNumbers, setLottoNumbers ] = useState([]);

    const today = new Date()
    const year = today.getFullYear()
    const month = today.getMonth() + 1
    const date = today.getDate()
    const now = `${year}년 ${month}월 ${date}일`

    return <div className='container'>
        <div className = 'lotto'>
            <h3><span>{now}</span> 로또 번호 추첨</h3>
        </div>
    </div>
}

export default App

App method map 사용
- 배열의 map – React에서 많이 사용할 예정
lottoNumbers
- 프로그램 초기에 비어 있는 배열
- 나중에 숫자 6개 채워질 예정
function(() => {})
// JavaScript callback function (indicated by arrow as if to say that the function will call the callback)
map()에는 callback이 들어가고, map의 callback 함수에는 자동으로 인자가 들어간다고 배웠습니다. 자동으로 들어가는 인자는 배열의 요소이기 때문입니다.
lottoNumbers.map((num, idx) => {})
index 번호를 하나씩 차례대로 받아가면서 요소를 return합니다. JSX에서는 component를 return할 수 있습니다.
{lottoNumbers.map((num, idx) => {
	return <div className='eachnum'>{num}</div>
})}
배열에다 map을 했으니 배열의 요소 수만큼으로 된 새로운 배열을 생성할 수 있다. 거기에다가 component를 채웁니다. component의 배열이 결괃적으로 반환이 된다. component 배열은 곧 component rendering으로 이어집니다.
동일한 패턴으로 6개 데이터가 나옵니다.
map을 이용한 컴포넌트 렌더링 시에는, 개별 요소에 key 속성을 추가한다. 개별 요소에다가 key 속성을 추가해서 서로 다르다고 표시하라고 react에서 요구를 한다. React에서 요구하응 것이고, 일반 JavaScript에서 요구하는 것이 아닙니다.
{lottoNumbers.map((num, idx) => {
	return <div className='eachnum' key={idx}>{num}</div>
})}
여기까지 숫자를 표시하는 로직이 끝났습니다. 이제는 버튼을 만들어야 합니다.
버튼 만들기
1) 추첨 버튼
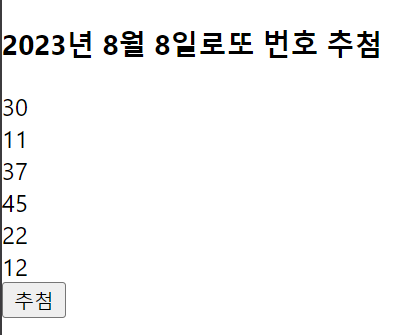
버튼을 누르면 setLottoNumbers 화면에 변화를 바로 가져가게 합니다. NOTE. 숫자 표시 로직은 유사합니다.
while문이 끝나면 추첨이 끝난다. 이때 setLottoNumbers 배열을 temp(상태)로 업데이트 하면 됩니다.
<button onClick={() => {
	const temp = []
	while(temp.length < 6){
		let ran = Math.floor(Math.random() * 45) + 1
		if(temp.indexOf(ran) === -1){
			temp.push(ran)
		}
	}
	setLottoNumbers(temp)
}}>추첨</button>
버튼 누르기 전

버튼 누른 후
2) 초기화 버튼
우선, 이 단계에서 stylesheet를 첨부했습니다.
import "./App06.css"
Stylesheet를 연결하고 나서 아래와 같이 결과가 달라졌습니다.
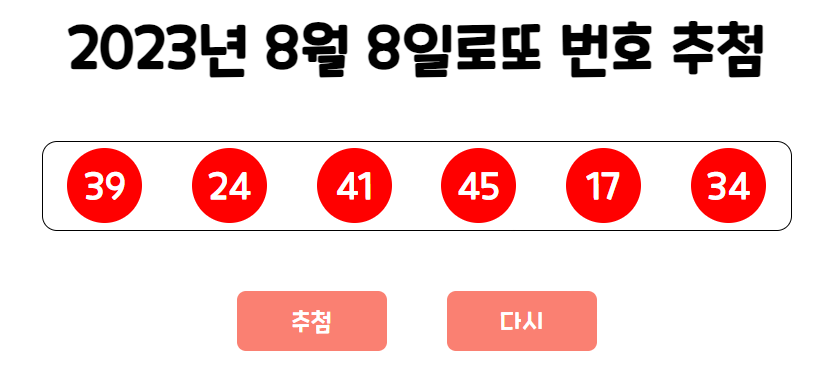
다시 버튼을 누를 때 로또 숫자들을 초기화할 수 있도록, setLottoNumbers를 다시 빈 배열로 만듭니다.
<button onClick={() => {
	setLottoNumbers([])
}}>다시</button>
과제 > lotto 프로그램 꾸미기
1. Google Fonts 가져오기
아래 링크를 App06.css 파일 안에 아래의 Google Fonts 링크를 첨부했습니다.
이 과제에서 제가 선택한 폰트는 Fira Mono와 Noto Sans KR입니다.
@import url('https://fonts.googleapis.com/css2?family=Fira+Mono:wght@400;500;700&display=swap')
2. 색깔 변경 및 다양한 효과 추가하기
윈도우 resizing해도 container를 center 포지션으로 자동으로 고정하는 기능을 CSS로 추가했습니다.
Animate.css라는 pre-made 애니메이션 컴포넌츠 라이브러리를 사용하여 추첨 버튼을 클릭할 때마다 숫자들이 나타나면서 바운스 애니메이션을 실행했습니다.
{lottoNumbers.map((num, idx) => {
	return <div className={`eachnum ${animate ? 'animate__animated animate__bounceIn' : ''}`} key={idx}>{num}</div>
})}
OUTPUT
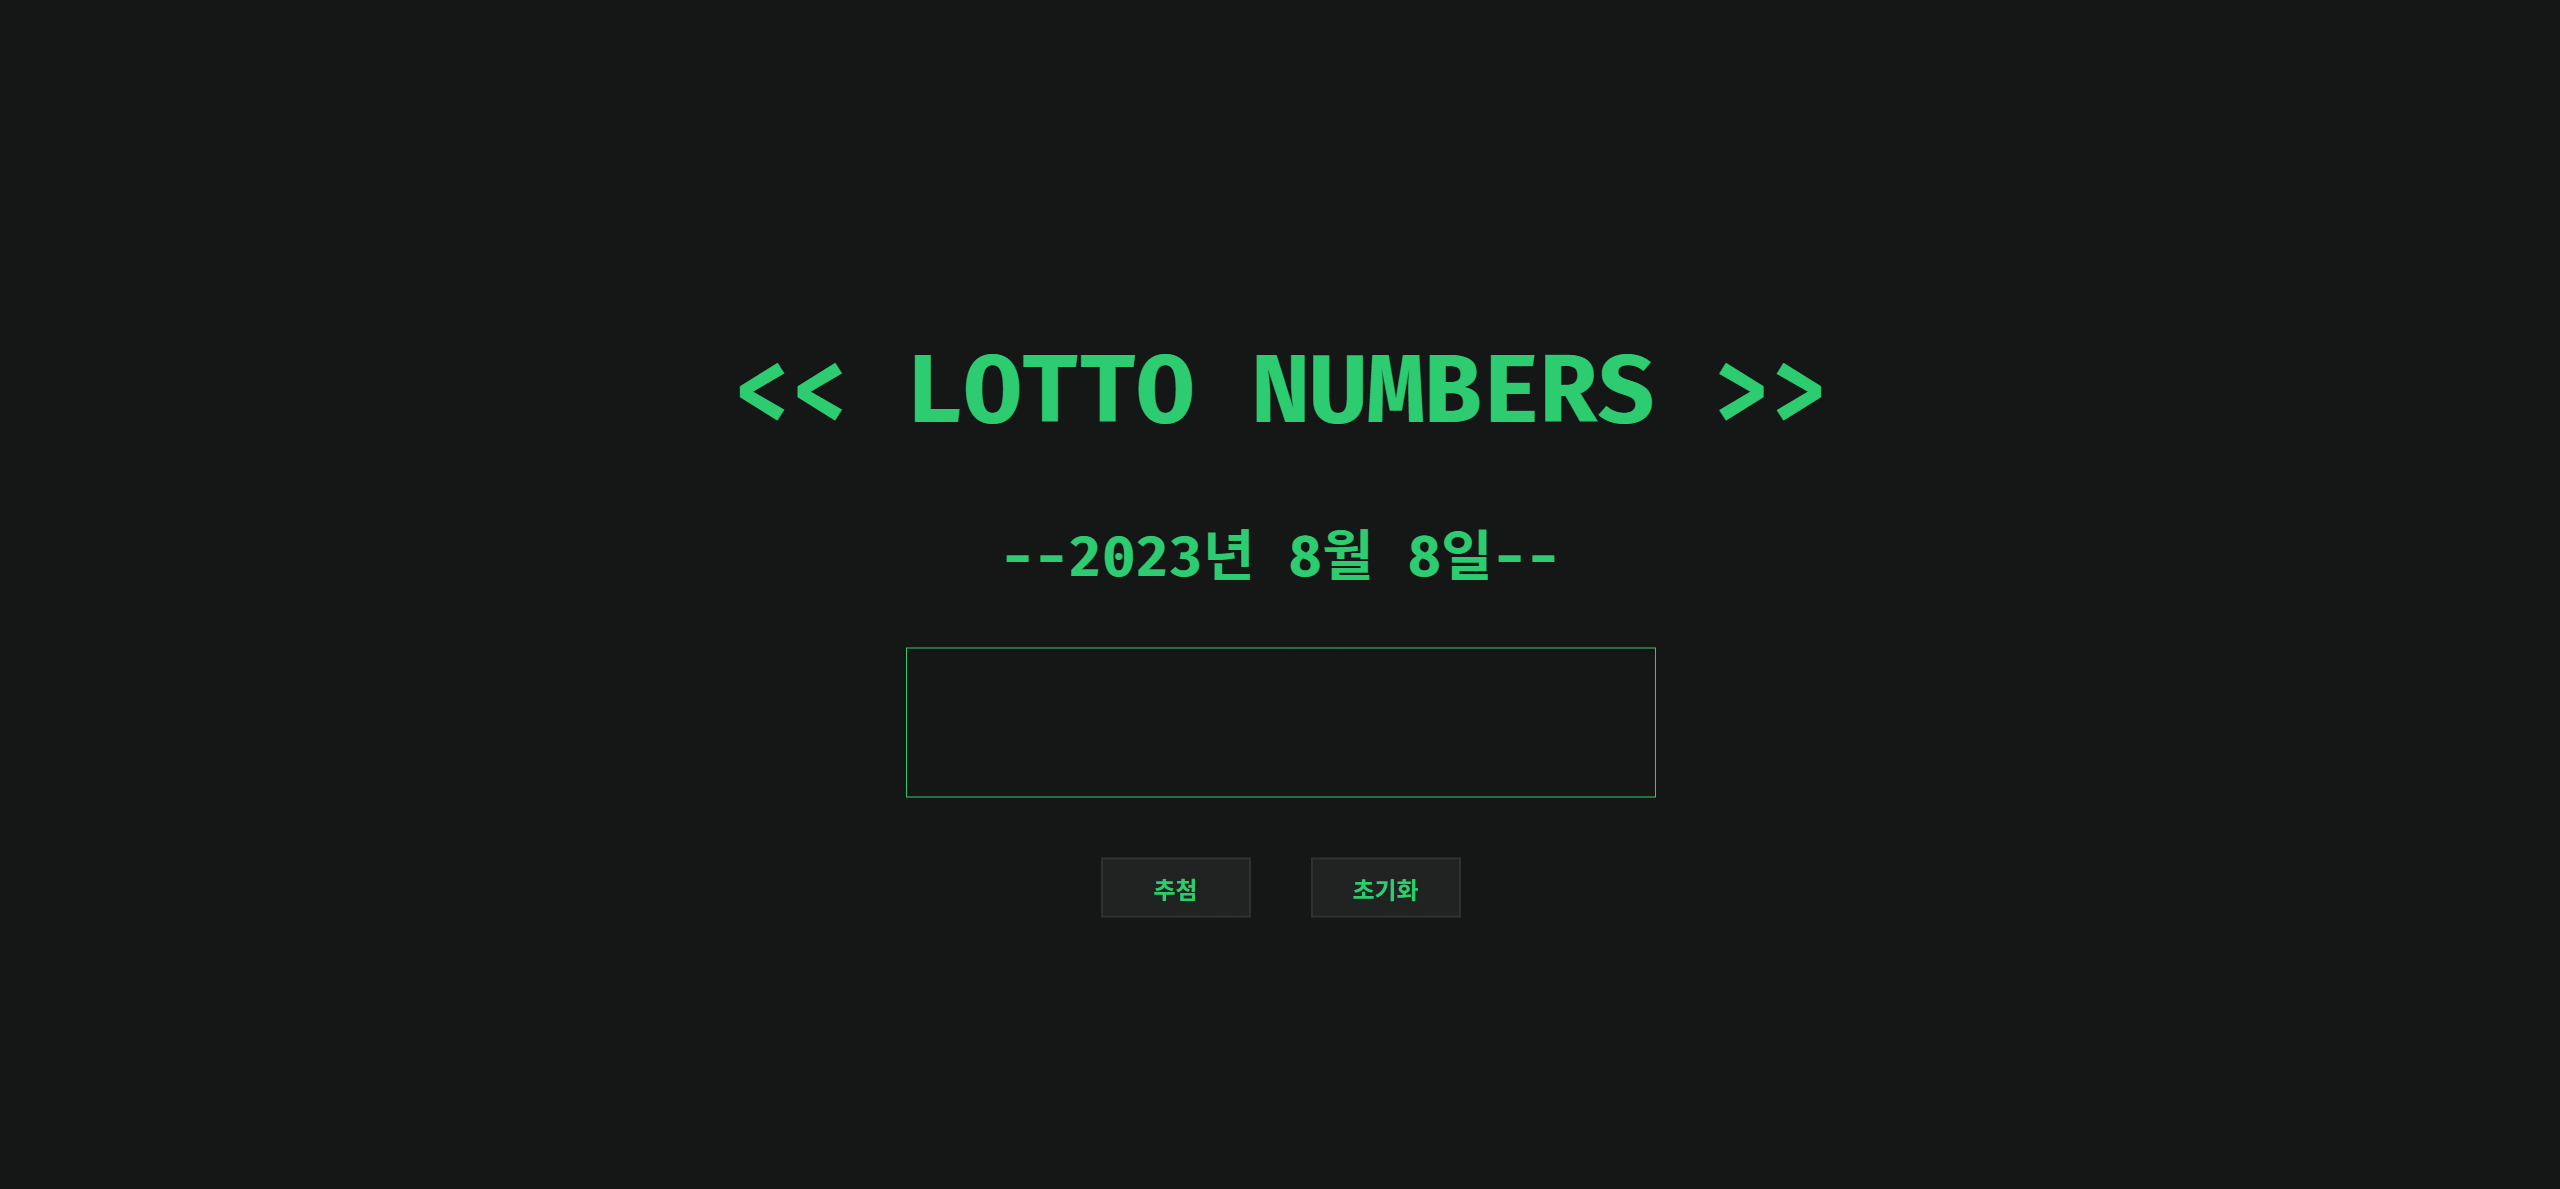
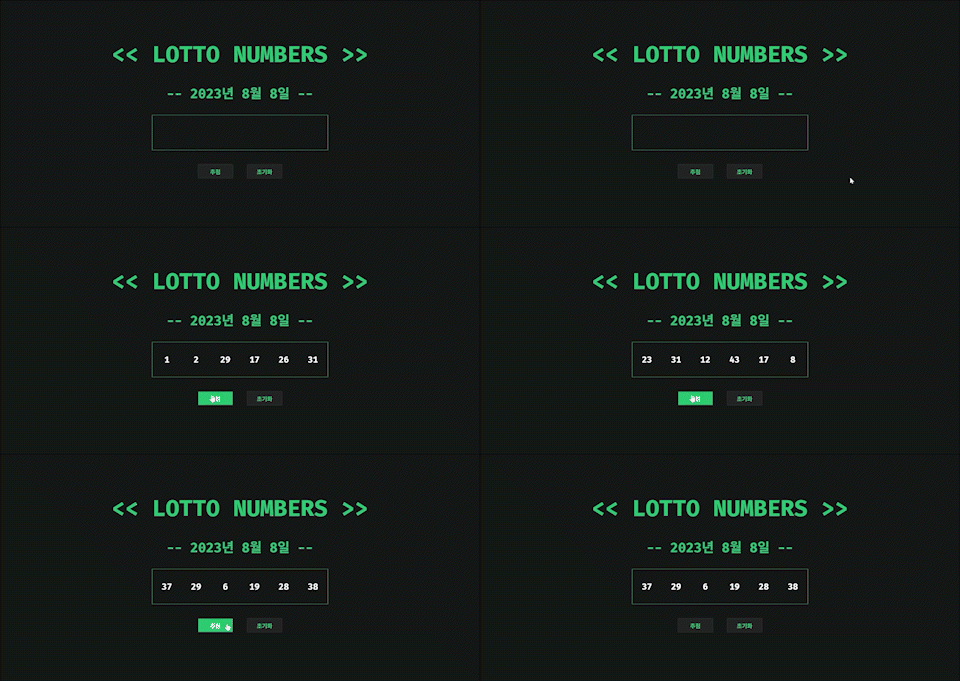
SOURCE. https://github.com/ganyunhee/ai_webdev/tree/main/react/0808_react_myapp
——————————————————————————
본 후기는 정보통신산업진흥원(NIPA)에서 주관하는 <AI 서비스 완성! AI+웹개발 취업캠프 - 프론트엔드&백엔드> 과정 학습/프로젝트/과제 기록으로 작성 되었습니다. #정보통신산업진흥원 #NIPA #AI교육 #프로젝트 #유데미 #IT개발캠프 #개발자부트캠프 #프론트엔드 #백엔드 #AI웹개발취업캠프 #취업캠프 #개발취업캠프